Overview
When you're installing Windows on a VPS via ISO you must also include VirtIO drivers for networking and storage which we've included in the ISO for you to make it easier. This article will show you the Windows Server installation process using our ISOs.
Selecting the ISO for installation
1 - Power off the server on the control panel
2 - Navigate to your server where you'll be making the Windows installation
3 - Go to settings, then settings which will present you with the following screen
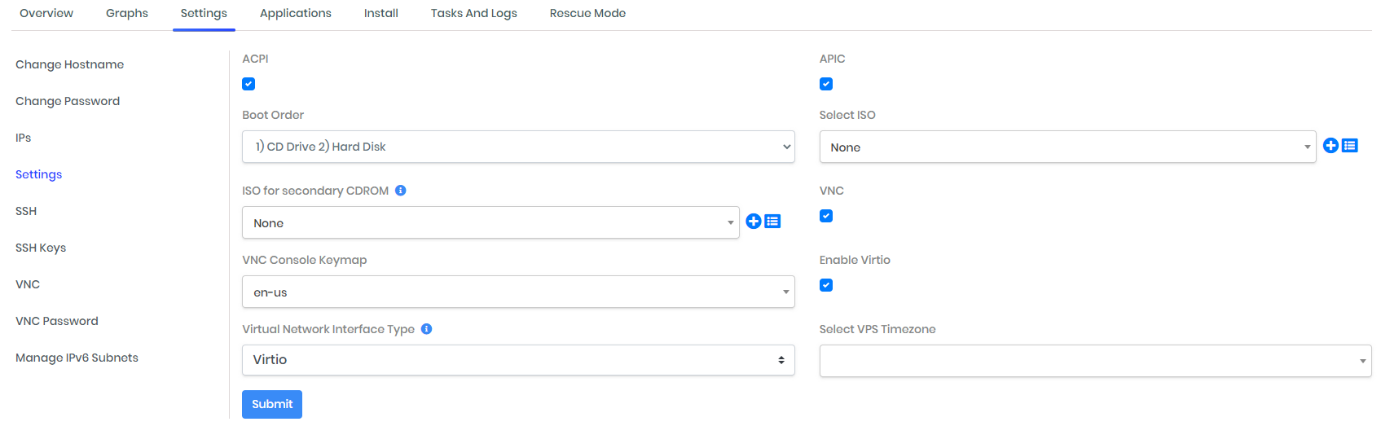
4 - For 'Select ISO' select the Windows Server version you wish to install - ensure it has 'virtio' in the name
5 - Change the boot order to '1) CD Drive 2) Hard Disk'
6 - Submit the changes
Installing Windows Server
The following example is using Windows Server 2019 however, it will be a similar process for 2008 -2016 versions:
1 - Start your VPS and immediately open VNC, hit ‘connect’ if using HTML5 VNC until VNC connects successfully
2 - Quickly press any key to boot the Windows ISO when prompted
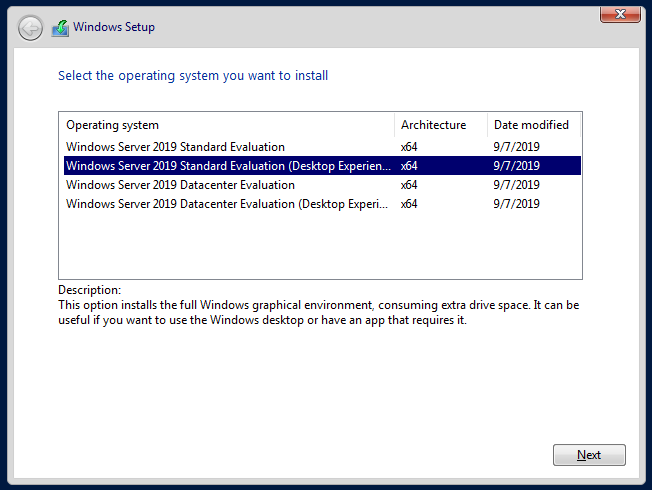
3 - Follow the steps selecting your language preference then hit 'Install now'
4 - For Windows Server with Desktop select 'Windows Server 2019 Standard/Datacenter Evaluation (Desktop Experience)'
4 - For the type of installation, we're going to select 'Custom' as this is a new Windows install
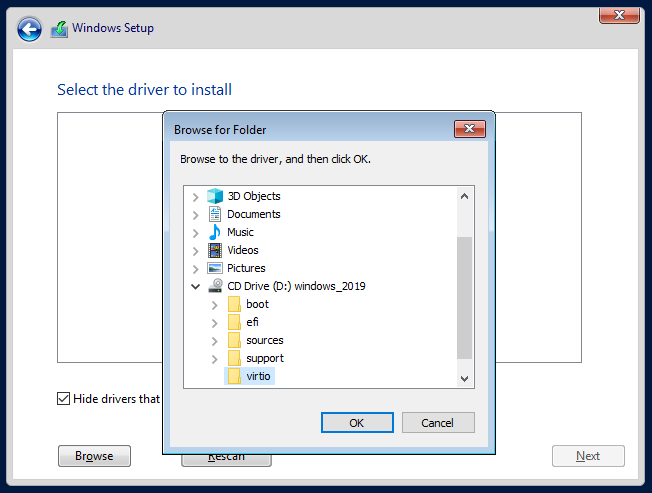
5 - Load the drivers by hitting 'Load driver', click on 'Browse' and under 'CD Drive (D:) windows_2019’ select 'virtio' and click OK
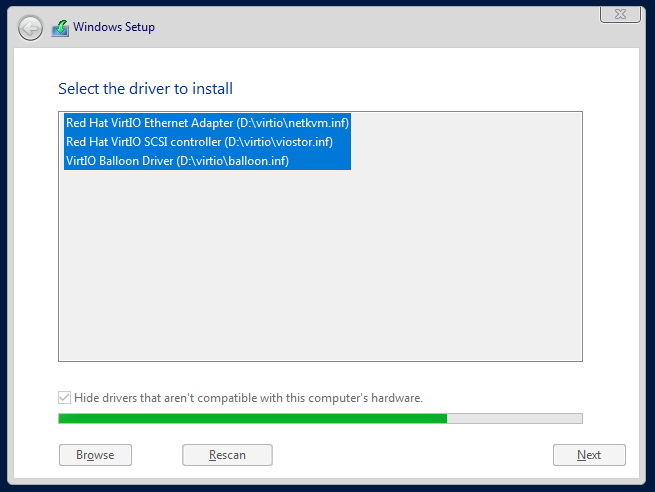
6 - Select all three drivers which should appear and click 'Next'
7 - Depending on how your VPS has previously been set up you may have more than one partition. Simply configure it to how you wish but we recommend removing unnecessary partitions.
Below is how it should look with one partition after having deleted all partitions.
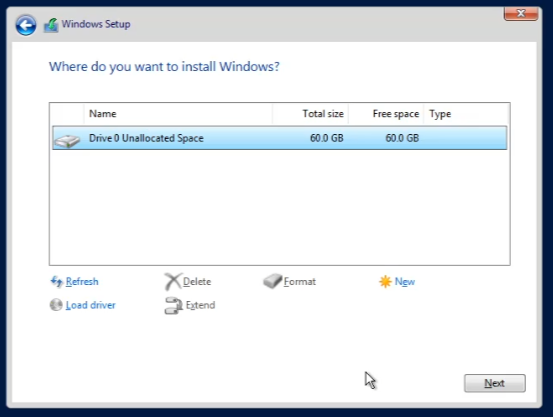
8 - Click ‘Next’ and follow the remaining steps to complete the installation
9 - After completing the installation, set the boot order on the control panel back to '1) Hard disk 2) CD Drive', set the ISO to 'None', shutdown the VPS and boot it back up via the VPS control panel
Enabling Windows RDP
Once the installation is complete, we recommend enabling RDP.
Windows 2019
1 - Search for 'Remote Desktop Settings' in the start menu
2 - Hit the toggle button to enable remote desktop
3 - You will now be able to connect to the server using Remote Desktop Connection by entering the VPS IP in your RDP client


 Facebook
 Twitter